Plastic Antweight Combat Robot
A custom-engineered 3D printed combat robot less than 1lb.
Time frame: December, 2020 - February, 2021
Introduction
Taking my intro from my Beetleweight combat robot since it’s the same concept: Ever seen BattleBots the TV show before? If not, it’s essentially lots of 250-lb remote-operated robots that destructively battle in a contained box with high-power spinners, drums, or flippers. It’s hard to describe in text, so I would recommend looking up a quick clip online. The power stored in these weapons are unfathomable. These cost upwards of a luxury vehicle and more.
This project is similar to those robots but on a much smaller (and cheaper) scale. I decided to do this under the guidance and funding of the combat robotics club at WPI. This is the second combat robot that I have designed, but on a smaller scale than the first. This is for learning and fun as well as to also participate in my friend’s Interactive Qualifying Project at WPI.
The “Antweight” class of combat robotics typically has a few basic rules and constraints, namely that the robots are less than 1 pound. For this robot and accompanying competitions, the notable differences are that all robots must be plastic and 3D printed (excluding electronics and fasteners). As of now, the only allowed plastics are PLA, ABS, and PETG. Other plastics and fabrication methods are not allowed; however, there may be more in the future. This is mainly to keep it fair and consistent to what is commonly accessible.
Design
I designed the robot to be a drum spinner - where a drum with a few impactors (“teeth”) spins to inflict damage. Here is the design in Solidworks:
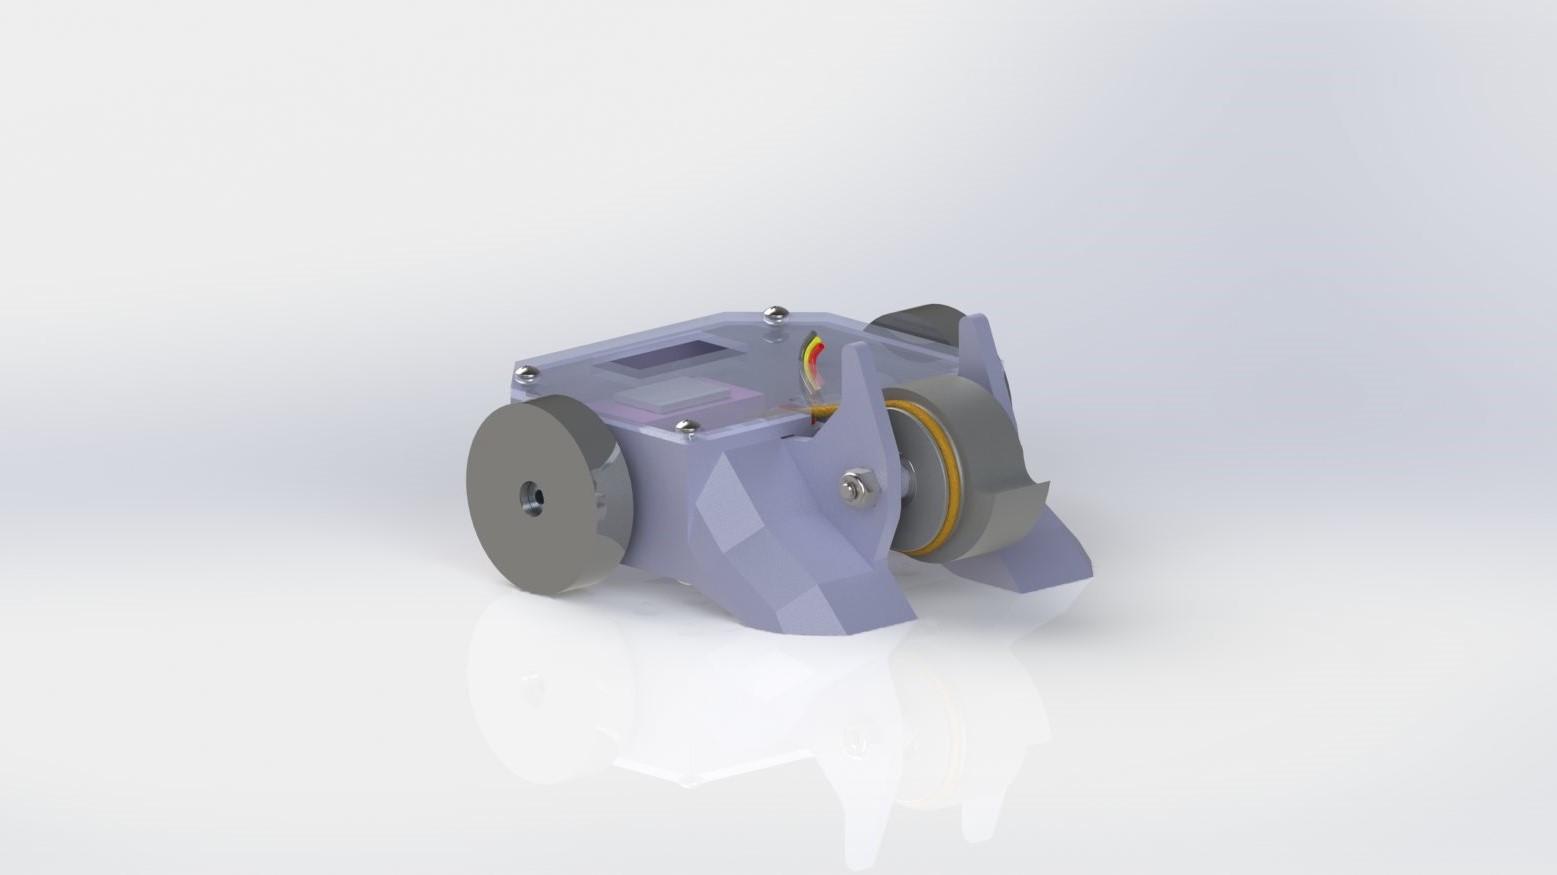
The entirety of the chassis is 3D printed, with a main body and modular components. I have been improving on my design for additive manufacturing - there is an entire set of factors to keep in mind while designing such as large tolerances, part/layer orientation, and mechanical design rules such as compression on axles and intentional shear points - just to name a few. Considering and carefully designing the parts with respect to these factors makes for a robust and optimized project. I may have mentioned this in my previous posts, but I’d like to place more emphasis on the layer orientation. For a 3D printed part, it will always have more strength parallel to its layers as opposed to perpendicular. With this in mind, the most critical modules are the ones that hold the axle for the drum spinner. These “rails” are constrained in several ways and when assembled, they are surprisingly rigid.
Material selection also is an important design choice when making a combat robot. This robot is mainly PLA due to its easy printing and low cost - PLA works great as it is rigid and high strength. The drum spinner is printed out of PETG plastic for its greater strength and impact resistance/ductility. The chassis of the robot may benefit from being printed in PETG but it’s simply easier and cheaper to use PLA as it is not a critical thing. CNC Kitchen on YouTube has excellent analysis of different filaments, performing real tests himself. Here’s one of his write-ups comparing strengths of common plastic filaments.
The weight analysis in the CAD drawings yielded 0.95 lbs or 15.2 ounces - just below the constraint. For increased accuracy in this, the empirical measurements for the weight of the electronics were overridden as well as the calculated weights for the 3D prints from Cura (the 3D printing slicing client). The actual weight after it was assembled and wired, came out to only 14.6 oz.
Assembly
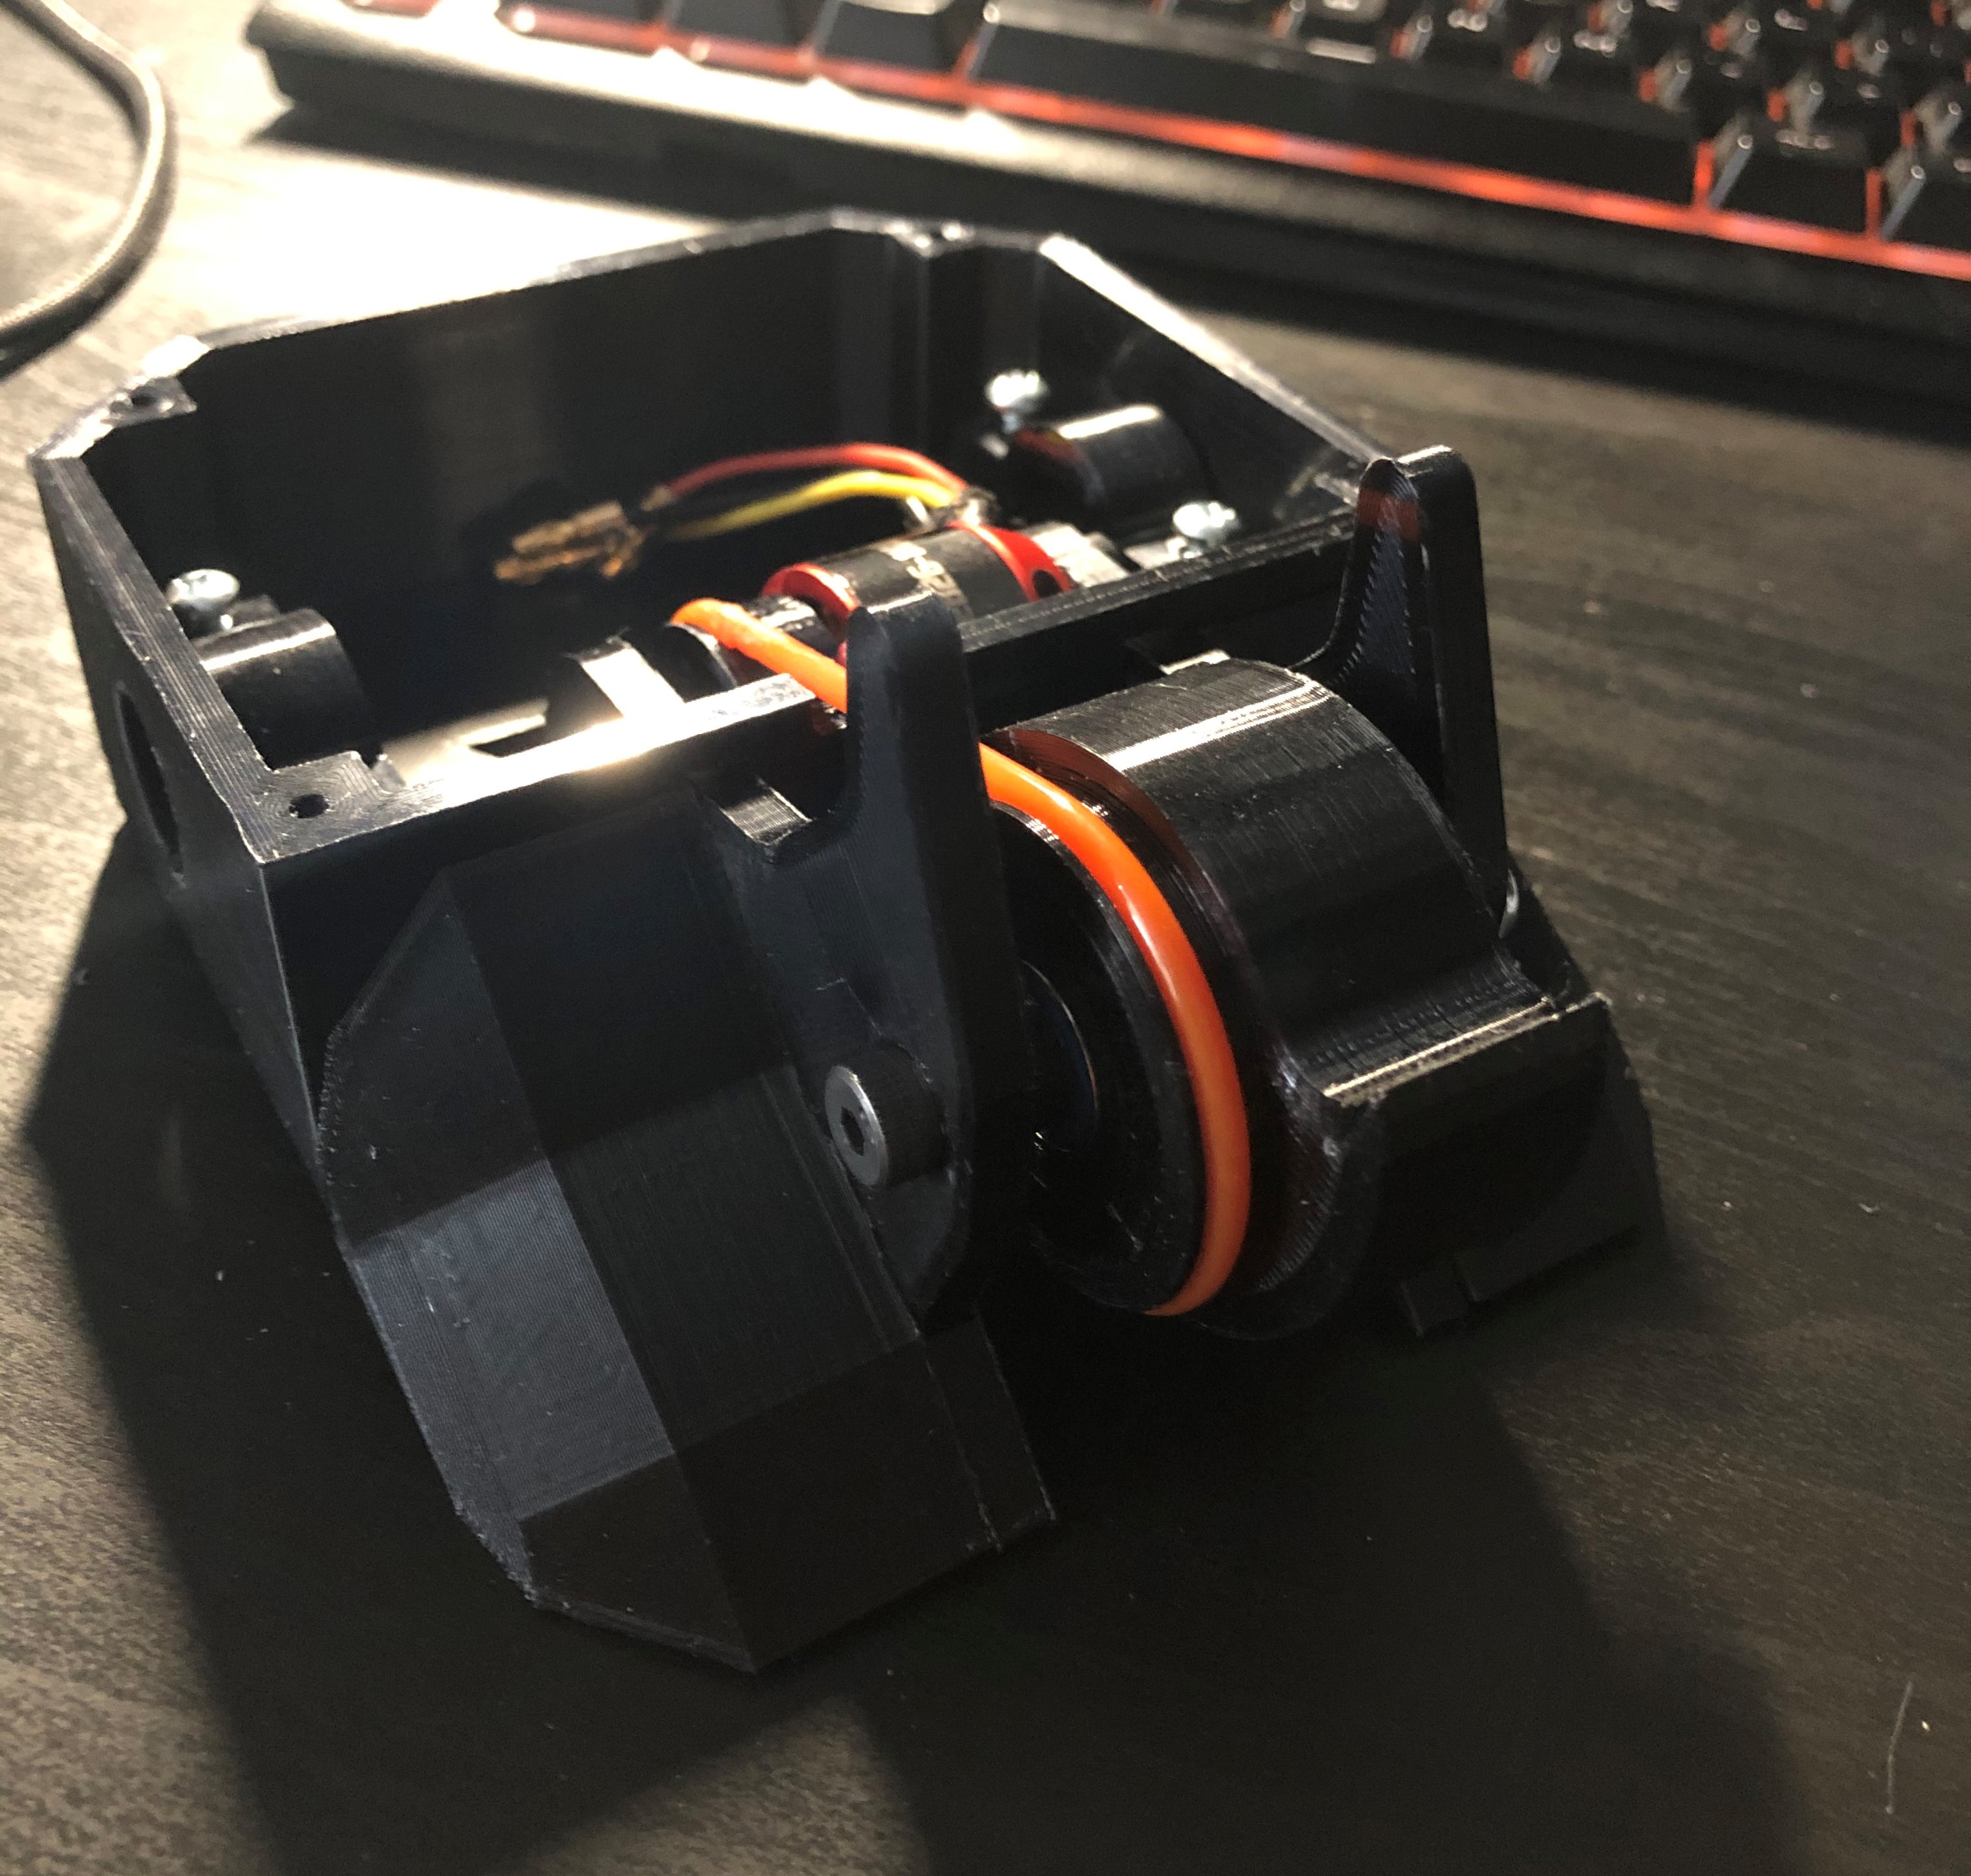
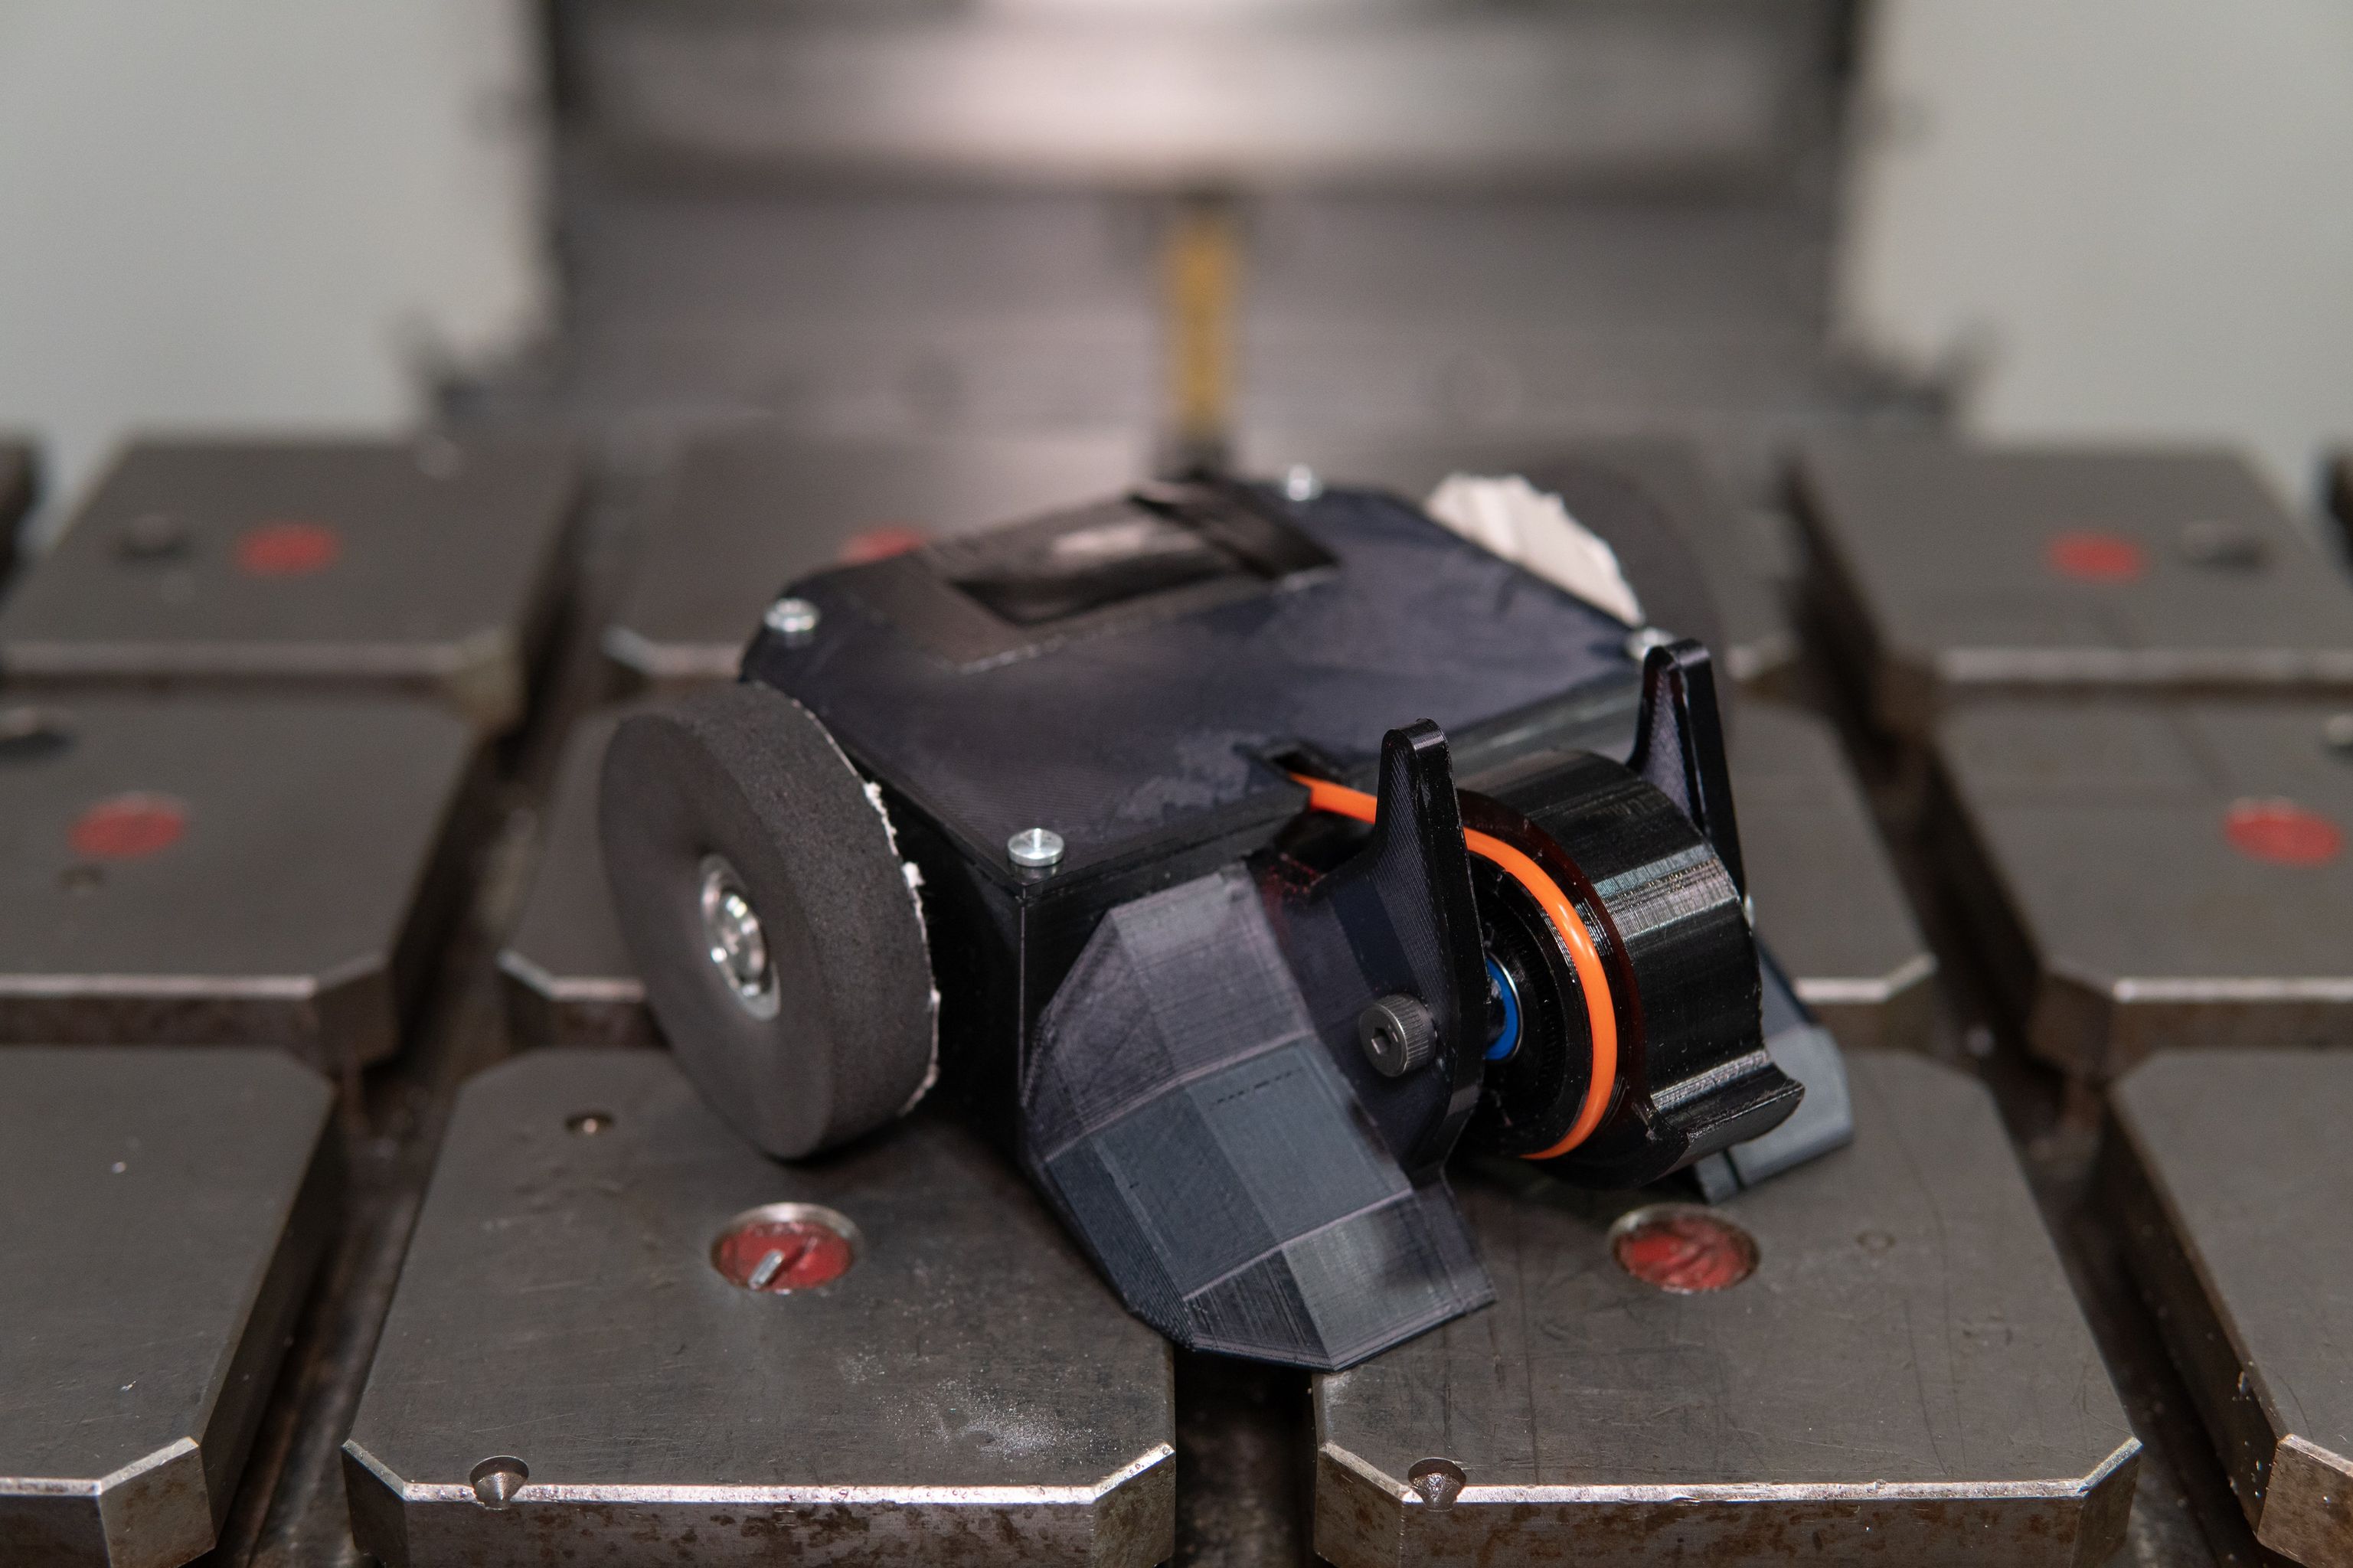
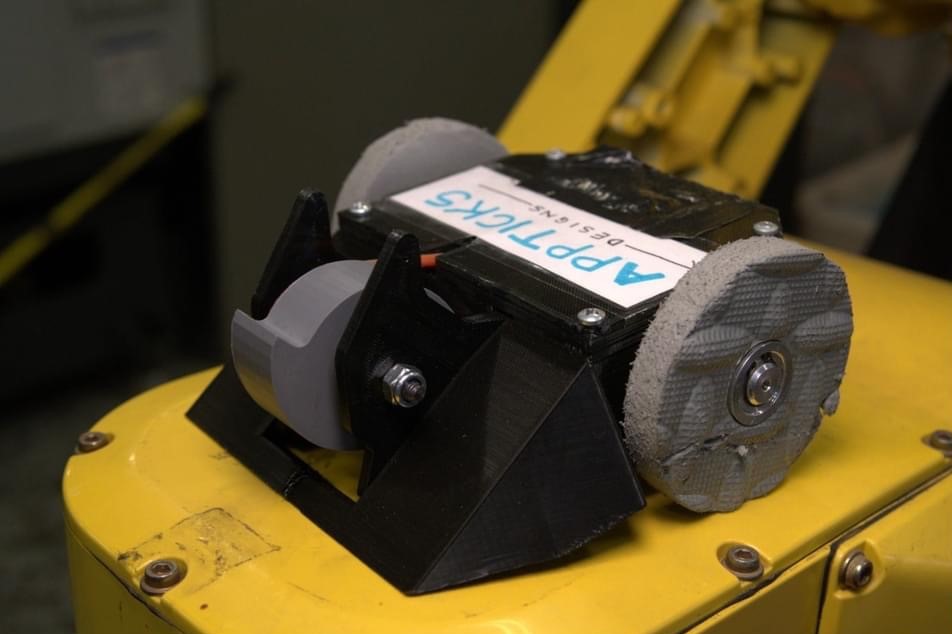
Here is the robot assembled (I had not put on the foam wheels until after the first two pictures were taken):
Competition(s)
Below is a picture after its debut competition. The robot performed surprisingly well and the main point of failure was my poor driving and low-quality drive motors. You can see the chips out of the PETG drum weapon and out of the PLA wedges. I went through two PETG drums as the first one split in half. It is truly amazing to see the power stored in these robot as another competitor’s impact chipped large chunks out of my PETG drum, independent of any layer lines or geometry of the part. The damage is pure shearing of the material.
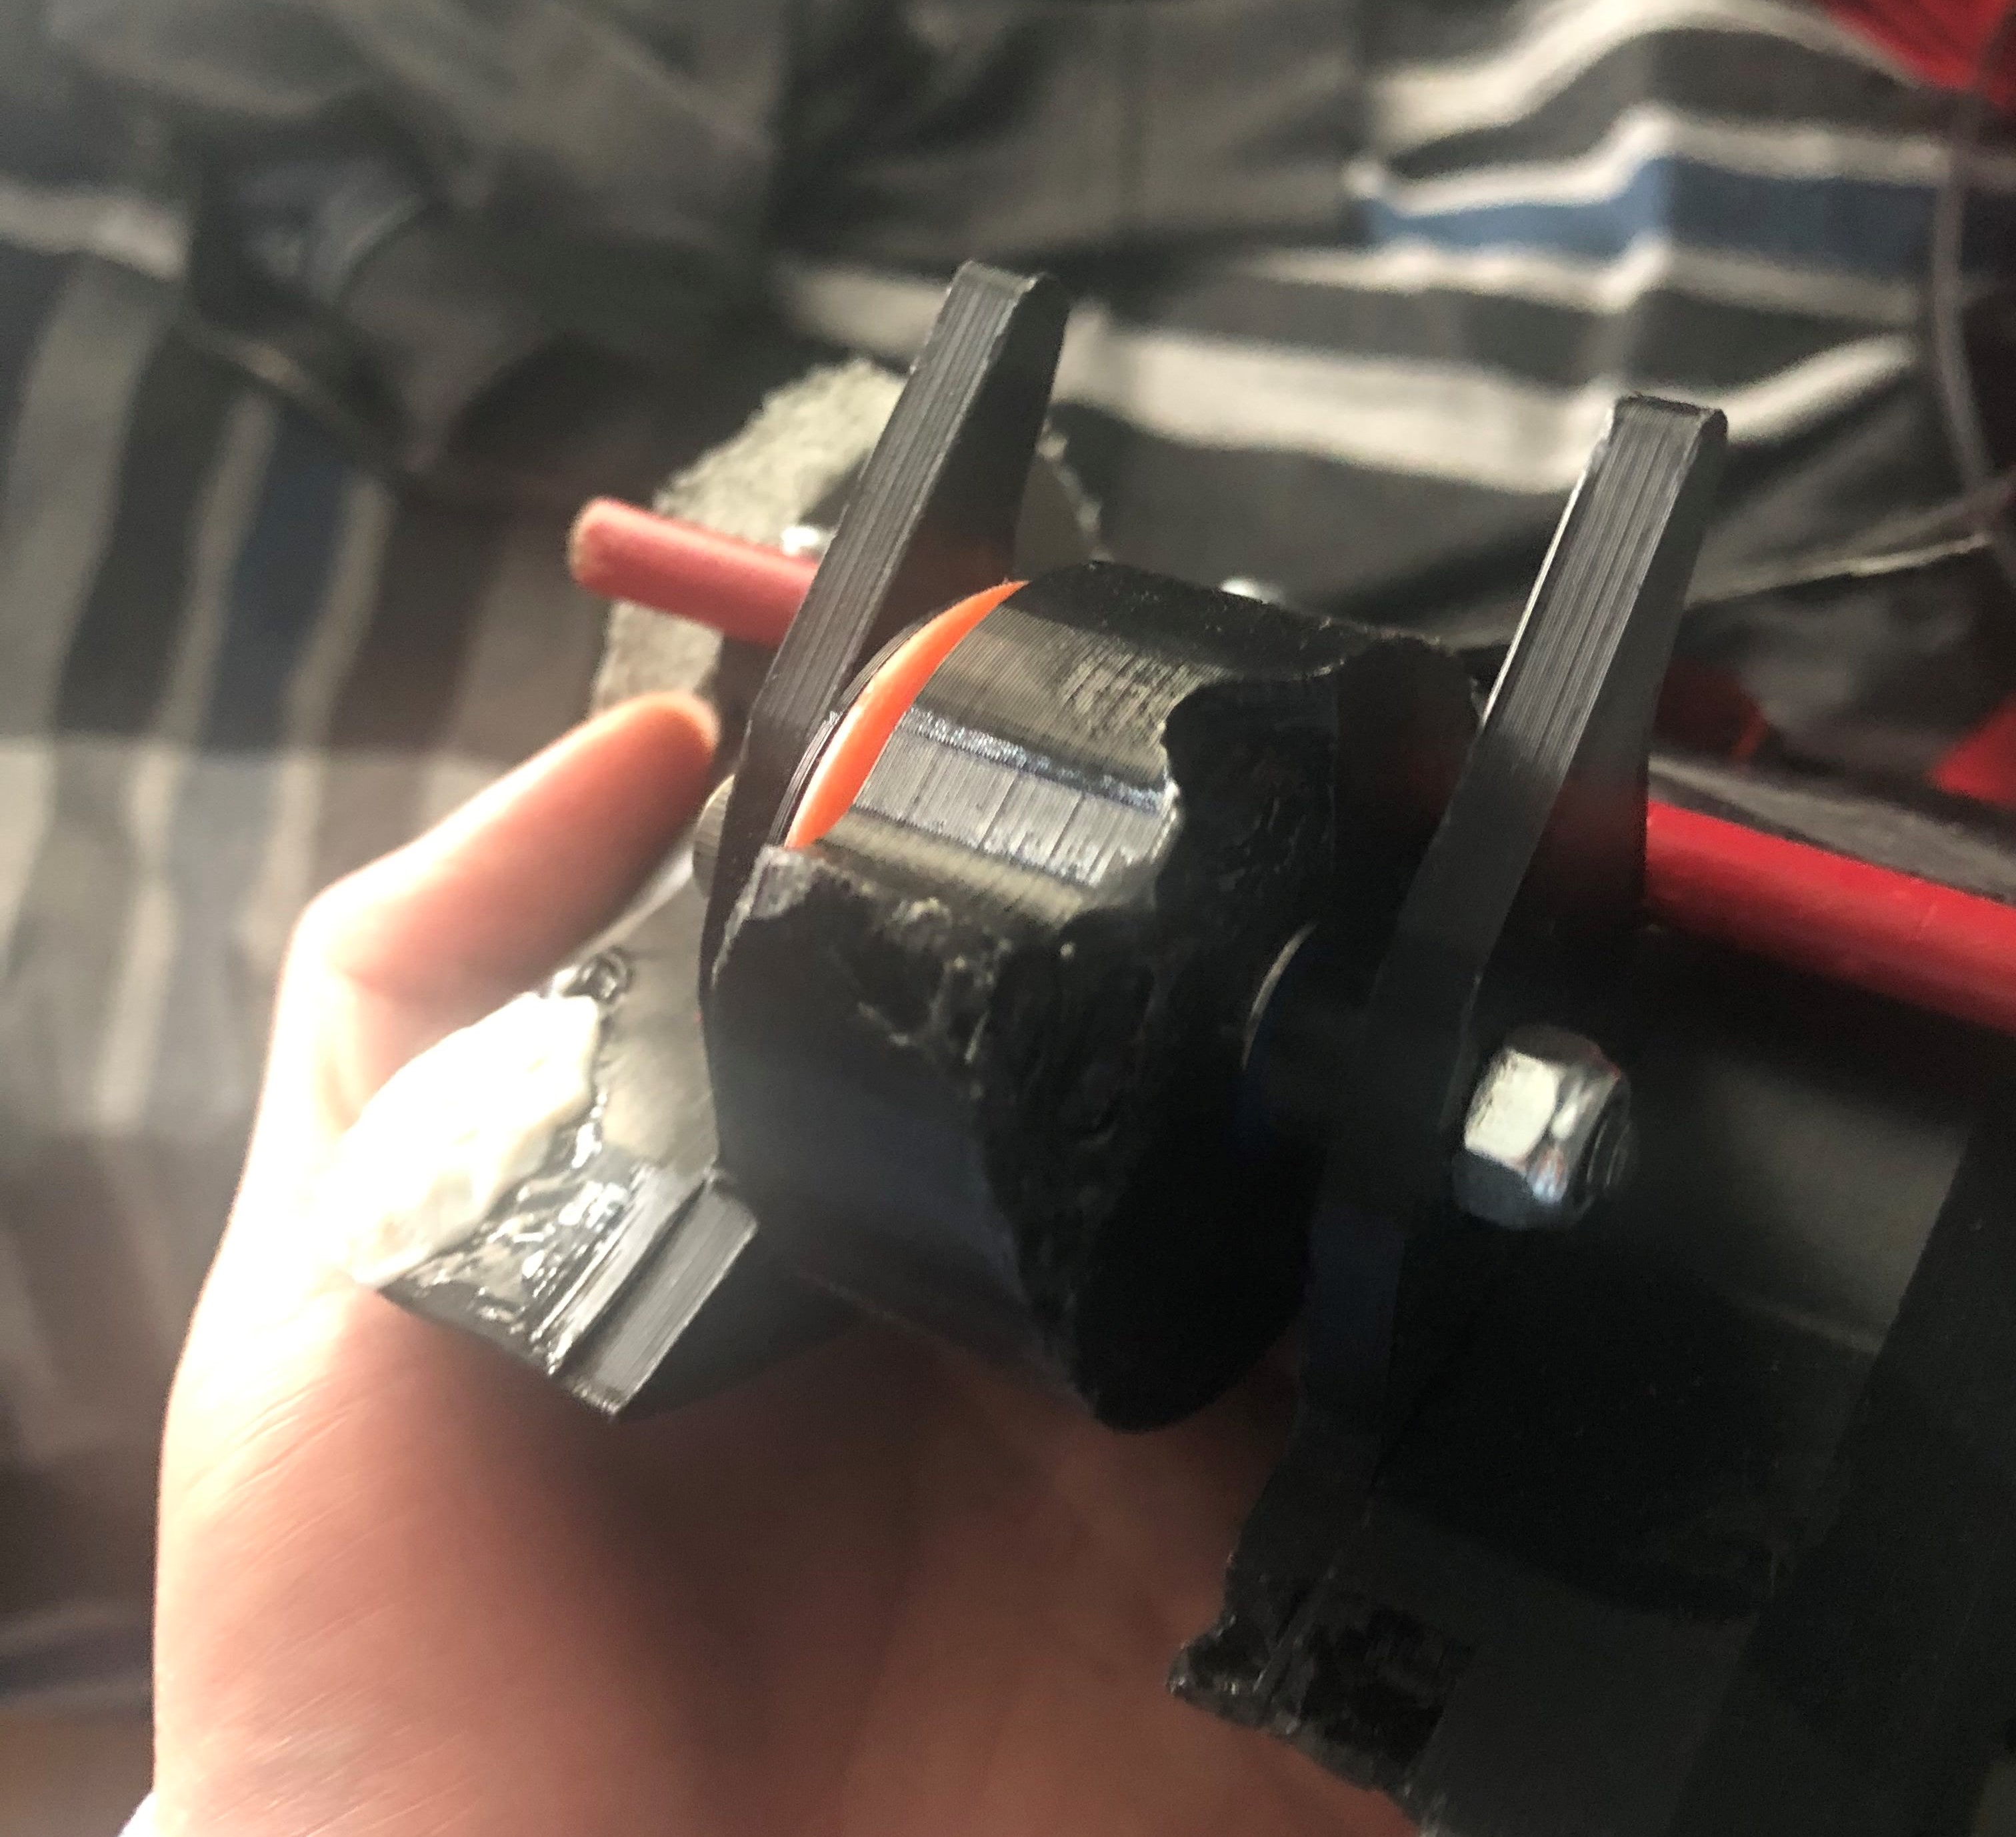
In the future, I plan to strengthen the areas that damaged easily and reoptimize the tooth geometry of the drum spinner to impart more damage and reduce chipping. Another fun tip I learned was to reheat the printed parts with a heat gun to improve the fusion between layers in the plastic, leading to increased strength.
Update April 2021
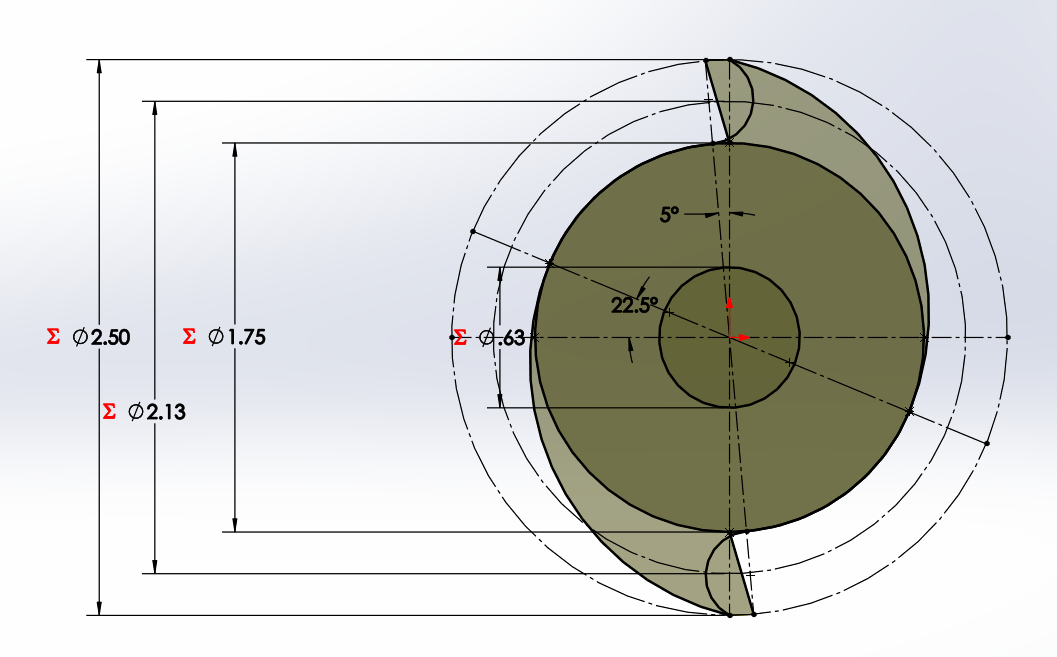
To spice things up, my friends running the competitions have altered the rules to allow for machined ABS and UPVC materials on our robots! These materials are significantly stronger than that of most 3D printed parts, so they are perfect for essential supports or weapons. I chose to make my drum out of UPVC and I machined it on one of the school’s mills. The new optimized geometry of the teeth on this drum are more flat (as opposed to curves) and have an inward rake angle so that it has more surface area for impact (and will not dull as fast), yet still be able to “pull” things in.
Here is a profile of the new drum design - the enclosed curves on the teeth are vestiges of the old design for reference:
 |
 |
Total Cost: ~$100, most cost subsidized by WPI